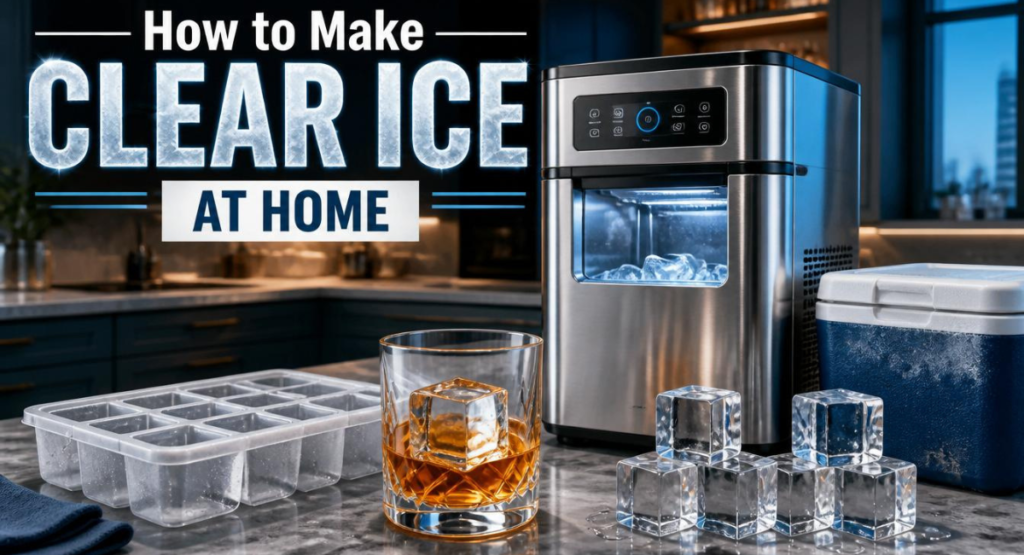
You have seen it at every good cocktail bar — that stunning, glass-like ice cube sitting in a perfectly poured whiskey. We tested every popular home method so you know exactly which ones actually work, how long each takes, and which ones just waste your time.
About This Guide: I am Waseem Khan, founder of IceMakerReviews.com. I have spent years researching how ice is made — from countertop machines to commercial ice programs. For this guide I tested every popular clear ice method personally, cross-referenced findings with food scientists, and pulled from real bartender expertise. No sponsorship. No brand deals. Just what actually works.
Table of Contents
I remember the first time I noticed it. I was at a nice cocktail bar, ordered an old fashioned, and the bartender placed this enormous, perfectly transparent cube of ice into my glass. It looked like a piece of glass. My drink stayed cold for nearly an hour without tasting watered down.
Then I went home and made the same drink. My ice from the freezer tray looked like a tiny white brick—cloudy, opaque, and melting fast. Within ten minutes, the cocktail tasted completely different.
That experience made me wonder how to make clear ice at home without spending hundreds of dollars on commercial equipment. After testing every popular method, I discovered what actually works, what is mostly a myth, and how to make crystal-clear ice that looks just like the cubes served at high-end cocktail bars.
In this guide, I’ll show you how to make clear ice at home using proven techniques, explain why most homemade ice turns cloudy, compare five popular methods, and answer a question that almost no other guide covers: can your countertop ice maker help produce clearer ice?
Why Clear Ice Is Actually Worth Making
Before we get into the how, let me answer the “why bother” question — because the answer goes beyond just aesthetics.
It Melts Slower
Clear ice is denser than cloudy ice. Cloudy ice is full of tiny air bubbles and trapped minerals — all that empty space means it has less actual ice per cube. Less ice means less cooling mass, which means it melts faster. Clear ice can last up to 30% longer in your glass than the same size cloudy cube. For a drink you are going to sip slowly, that difference is significant.
It Does Not Dilute Your Drink as Fast
This one matters if you care about cocktails or good whiskey. A cloudy ice cube starts diluting your drink faster because it has more surface area (all those air pockets create micro-surfaces where melting begins). A dense, clear cube melts from the outside only — slowly, evenly, in a controlled way. According to food scientists at the University of Southern Queensland, clear ice dilutes drinks more slowly because it contains fewer impurities and air pockets.
It Has No Taste
Tap water ice carries dissolved minerals, chlorine, and whatever else is in your local water supply. When that ice melts into your drink, those flavors go with it. Clear ice made with filtered or distilled water introduces zero unwanted flavor. For spirits like whiskey or tequila where flavor purity matters, this is not a small thing.
It Looks Incredible
Yes, this matters too. A clear ice cube in a glass looks like something crafted intentionally. It signals quality and attention to detail — whether you are serving guests or just treating yourself to a well-made drink on a Friday night.
💰 Real Cost Breakdown: A gallon of distilled water costs about $1.00 at most grocery stores. A small cooler for the method costs $10 to $20 (used once, kept forever). Total investment for your first batch of bar-quality clear ice: under $15. Every batch after that costs roughly $0.25 to $0.50 in water. This is not an expensive hobby.
Why Your Ice Is Always Cloudy — The Real Reason
Here is something most people get wrong: cloudy ice is not caused by dirty water. You can use the purest distilled water in the world and still get cloudy ice if you freeze it the wrong way.
When you pour water into a standard ice tray and put it in the freezer, the freezing starts from all sides simultaneously — the bottom, the sides, and the top all begin to freeze at the same time, working inward toward the center.
As each layer of ice forms, it pushes dissolved air bubbles, minerals, and gases ahead of it. All of these impurities converge toward the center of the cube from every direction. With nowhere to escape, they get trapped right in the middle — creating that cloudy white core you see in every home-made ice cube.
According to ScienceABC, the cloudy appearance happens because light scatters when it hits these trapped air bubbles and mineral deposits — the same physics that makes fog look white. The ice itself is not dirty. It is just full of tiny light-scattering impurities frozen in place.
🔬 The Physics in Plain English: Imagine squeezing a crowd of people into a room from every door at once — they collide and pile up in the middle. That is what happens to dissolved air and minerals when ice freezes from all sides. Now imagine everyone entering from only one door in an orderly line — the room fills cleanly with no pile-up. That is directional freezing. Same water, completely different result. Biology Insights explains the full physics here.
💡 The Key Insight: The solution to cloudy ice is NOT better water. It is controlling the DIRECTION of freezing. This is called directional freezing — and it is the only method that reliably produces crystal clear ice at home.
The Secret — Directional Freezing Explained Simply
Directional freezing means forcing water to freeze from one direction only — instead of from all sides at once.
When ice forms from only one direction — say, from the top downward — the dissolved gases and minerals do not get trapped. Instead, they get pushed ahead of the slowly advancing ice front, moving downward into the still-liquid water below. By the time the top section has frozen solid and clear, all the impurities are concentrated in the small amount of liquid water at the bottom.
You then discard that cloudy bottom section and keep the crystal clear top.
The technique was first documented for home use by cocktail writer Camper English of Alcademics.com, and has since been confirmed by food science publications including The Kitchn. Every high-end cocktail bar producing clear ice is using some version of this principle — either with a commercial directional freezing machine or with the cooler method we are about to cover.
Quick Method Comparison — All 5 Methods at a Glance
Not sure which method to start with? Here is the full picture before we dive into the details:
| Method | Clarity Result | Time Required | Cost | Effort | Verdict |
|---|---|---|---|---|---|
| Cooler Method | ⭐⭐⭐⭐⭐ Crystal Clear | 18–24 hrs | $0 (cooler you own) | Medium | ✅ Best Overall |
| Clear Ice Tray Mold | ⭐⭐⭐⭐ Very Clear | 18–24 hrs | $25–$60 | Low | ✅ Best for Convenience |
| Distilled Water + Cooler | ⭐⭐⭐⭐⭐ Best Possible | 18–20 hrs | ~$1/gallon | Medium | ✅ Highest Quality |
| Boiled Water (Standard Tray) | ⭐⭐ Still Cloudy | 4–6 hrs | $0 | Low | ⚠️ Skip This |
| Distilled Water (Standard Tray) | ⭐⭐⭐ Slightly Clearer | 4–6 hrs | ~$1/gallon | Low | ⚠️ Not Enough Alone |
| Countertop Ice Maker + Filtered Water | ⭐⭐⭐ Clearer Bullets | 6–8 min/batch | Machine cost | Very Low | 💡 Good for Daily Use |
Method 1 — The Cooler Trick (Best Result, Most Reliable)
🥇 Best Overall Method — Tested Winner
This is the method professional bartenders use at home. It produces the clearest ice of any home technique. It requires zero special equipment beyond a small insulated cooler that fits in your freezer.
What You Need
- A small insulated lunch cooler or soft-side cooler that fits in your freezer
- Tap water, filtered water, or distilled water (filtered or distilled gives slightly better results)
- A serrated knife
- A cutting board
- 18 to 24 hours of patience
Step-by-Step Instructions
1
Fill the cooler with water
Pour 4 to 5 inches of water into your cooler. Do NOT put the lid on — leave the top completely open and exposed. This is the most important rule of the whole process.
2
Place in your freezer
Put the open cooler in your freezer. Make sure it sits flat and level — tilted water freezes unevenly. Leave it completely undisturbed.
3
Wait 18 to 20 hours
Check the block at 18 hours. The top two thirds should be frozen solid and clear. The bottom third should still be liquid. This is exactly what you want — stop here.
4
Stop before it freezes solid
This is the most common mistake. If you wait until the whole block is completely frozen, the bottom liquid also freezes cloudy. Remove it when the bottom third is still liquid water.
5
Pop the block out
Flip the cooler upside down in your sink. Let it sit for 5 to 10 minutes. The ice block should slide out on its own. If stubborn, briefly run warm water over the outside bottom of the cooler.
6
Separate clear from cloudy
You will see a clear top section and a cloudy bottom section with a visible boundary. Use a serrated knife to score along that boundary line and snap the cloudy section off. Discard it — or crush it for blended drinks.
7
Cut into cubes or shapes
Score the clear block into the cube size you want using your serrated knife. Press firmly and the ice will snap cleanly along the score lines. For spheres, use a sphere mold press if you have one.
8
Temper before use
Let your cut cubes sit at room temperature for 2 minutes before dropping them in a glass. This prevents thermal shock cracking when cold ice meets a warm glass.
“My husband Alex and I have been doing this for years for all our cocktails, and it truly transforms them. This simple method makes any cocktail look like it was crafted in a fancy bar.” — Alex and Sonja Overhiser, A Couple Cooks
Results You Can Expect
The cooler method produces clear ice in approximately 80% of attempts. The top two thirds of the block are genuinely crystal clear — comparable to what you would see at a quality cocktail bar. The cloudy bottom section represents roughly 20 to 30% of the total water you started with, which is discarded.
Why It Works
The cooler’s insulated walls and bottom prevent the water from freezing from the sides and bottom. The only exposed surface is the top — so ice forms exclusively from the top downward, pushing all impurities into the liquid water below.
Method 2 — Clear Ice Tray Mold (Easiest, Good Results)
🥈 Best for Convenience
If the cooler method sounds like more effort than you want to invest, clear ice tray molds are the next best option. These are specially designed silicone trays with an insulated outer housing that replicates the directional freezing principle automatically.
How They Work
A clear ice tray mold has an insulated base and sides that block freezing from below and the sides. Only the top surface is exposed to the freezer air. Water freezes downward through the tray cavities, pushing impurities to the bottom of each mold — where they either stay as liquid or form a small cloudy section you remove.
Pros
- Much smaller than a cooler — fits easily in any freezer drawer
- Produces cubes in specific sizes and shapes (spheres, large rocks, standard cubes, Collins spears)
- Cleaner process — no cutting or knife work needed
- Reusable indefinitely
- Great for consistent results batch after batch
Cons
- Cannot cut cubes into custom or organic shapes
- Takes the same 18 to 24 hours as the cooler method
- Quality varies significantly by brand — cheap molds do not insulate properly and produce cloudy results
- Good quality molds cost $25 to $60
💡 Pro Tip — Buying a Clear Ice Mold: Avoid any “clear ice” mold under $20. Cheap silicone molds without a proper insulated outer housing are just regular ice trays with a marketing label. Look for molds with a hard plastic insulated outer shell and a separate silicone inner mold. Brands like Wintersmiths, Tovolo, and Clearly Frozen consistently produce real results. For full product reviews, visit our equipment guide at IceMakerReviews.com.
Method 3 — Boiled Water in a Standard Tray (Mostly a Myth)
⚠️ Disappointing Results — Skip This
You have probably seen this tip everywhere: boil your water before freezing and you will get clearer ice. I tested it. Here is the honest truth.
Boiling does remove some dissolved oxygen from water — that part is accurate. Less dissolved gas in the water means slightly fewer air bubbles trapped in the ice. So boiled water in a standard tray does produce marginally clearer ice than cold tap water in a standard tray.
But marginally is the key word. The ice will still be clearly cloudy because the fundamental problem — freezing from all sides simultaneously — has not been addressed. You have reduced one source of impurities slightly but left the core issue completely unchanged.
Professor Paulomi (Polly) Burey, food scientist at the University of Southern Queensland, confirms this: boiling water does not guarantee clear ice because it still freezes from the outside in when placed in a standard tray, concentrating any remaining impurities in the centre.
Verdict: Save the effort. Boiled water alone does not make clear ice.
Method 4 — Distilled Water (Better, But Not Enough Alone)
🟡 Good Addition — Not a Standalone Solution
Distilled water has had virtually all minerals and impurities removed through evaporation and condensation. That means there is less “stuff” to get trapped in the middle of your ice cube.
Distilled water in a standard tray does produce noticeably clearer ice than tap water in a standard tray. The results are better than boiling. But the ice still freezes from all sides and the remaining dissolved air still gets trapped — you end up with a smaller cloudy core, not a clear cube.
Where distilled water genuinely shines: combined with the cooler method or a clear ice tray. Distilled water plus directional freezing produces some of the clearest ice possible at home — approaching bar quality with relatively simple equipment.
Distilled water is inexpensive — roughly $1 per gallon at most grocery stores. If you are going to invest time in making clear ice, spending an extra dollar per batch on distilled water is absolutely worth it.
Method 5 — Your Countertop Ice Maker (The Angle Nobody Else Covers)
💡 Unique Insight — Only on IceMakerReviews.com
Here is something you will not find in any other guide about making clear ice at home: can your countertop ice maker help?
The honest answer is: partially, yes — with the right approach.
Why Standard Countertop Ice Makers Produce Cloudy Ice
Portable countertop ice makers like the EUHOMY, Silonn, and Chefman make ice by rapidly cooling metal prongs submerged in water. Ice forms around the prongs in 6 to 8 minutes. That rapid process traps dissolved air and minerals inside the ice — producing the hollow bullet-shaped cubes that are inherently somewhat cloudy.
You cannot make perfectly clear large cubes with a standard bullet ice maker. The rapid freeze cycle simply does not allow time for impurities to migrate away.
What You Can Do to Get Clearer Ice From Your Machine
- Use filtered or distilled water. Fewer dissolved minerals means fewer impurities in the ice. Buyers who switch from tap water to filtered water consistently report clearer, better-tasting bullet ice.
- Keep the machine clean. Mineral scale buildup inside the machine gets into the ice during production. Run your self-cleaning cycle every week. A clean machine makes cleaner, clearer ice.
- Use cold input water. Cold water contains less dissolved oxygen than warm water. Filling your machine with cold filtered water produces noticeably clearer bullet ice than room-temperature tap water.
When to Use a Countertop Machine vs the Cooler Method
| Situation | Best Method | Why |
|---|---|---|
| Daily cold drinks, iced coffee, water | Countertop ice maker | Fast, convenient, perfectly adequate clarity |
| Cocktails for guests | Cooler method | Crystal clear large cubes, impressive presentation |
| Whiskey on the rocks | Cooler method or clear ice tray | Slow melt, pure flavor, bar quality |
| Need ice in 6 minutes right now | Countertop ice maker | No other method is remotely this fast |
| Photos or content creation | Cooler method | Visual quality unmatched by machine ice |
| Large party, high volume | Countertop ice maker | 26 lbs per day, continuous production |
Clear Ice Shapes — Which to Make and When
One thing most clear ice guides skip entirely: once you have mastered the technique, which shape should you actually make? Here is a practical guide:
| Ice Shape | Best Drink Pairing | How to Make It | Melt Rate |
|---|---|---|---|
| Large Cube (2 inch) | Whiskey, bourbon, aged rum | Score cooler block into 2-inch sections | Slowest — ideal for sipping spirits |
| Sphere (2 inch) | Whiskey, mezcal, scotch | Clear ice tray mold with sphere cavity | Slowest possible — least surface area |
| Collins Spear | Highballs, gin & tonic, vodka soda | Clear ice tray mold — spear style | Medium — fills glass, stays elegant |
| Rocks Cube (1.5 inch) | Negroni, old fashioned, Manhattan | Score cooler block into 1.5-inch sections | Medium — good balance of size and cooling |
| Cracked chunks | Tiki drinks, mojitos, juleps | Wrap clear ice block in towel and tap with mallet | Fast — large surface area is intentional |
🥏 The Sphere Debate: Spheres are visually stunning and have the smallest surface area of any shape — which means the slowest theoretical melt rate. In practice, a 2-inch sphere and a 2-inch cube perform very similarly in a home drink setting. The sphere wins on appearance; the cube is easier to make at home without a press mold. For whiskey photography, spheres are unbeatable.
Time and Temperature Chart — What to Expect
Results vary based on your freezer temperature and water type. Here is a realistic guide:
| Freezer Temp | Water Type | Time Needed | Clarity Result | Clear Yield |
|---|---|---|---|---|
| 0°F (-18°C) | Distilled | 18–20 hours | ⭐⭐⭐⭐⭐ Excellent | 75–80% |
| 0°F (-18°C) | Filtered | 20–22 hours | ⭐⭐⭐⭐ Very Good | 70–75% |
| 0°F (-18°C) | Tap water | 20–24 hours | ⭐⭐⭐ Good | 65–70% |
| 5°F (-15°C) | Filtered | 22–26 hours | ⭐⭐⭐⭐ Very Good | 70–75% |
| 10°F (-12°C) | Any | 28–34 hours | ⭐⭐⭐ Good | 65% |
| Standard tray / any temp | Any | 4–6 hours | ⭐ Cloudy | 0% |
Your freezer temperature significantly affects results. Most home freezers are set between 0°F and 5°F. Colder freezers freeze faster but give slightly less clear results because the rapid cooling gives impurities less time to migrate. Warmer freezer settings within the safe range tend to produce the clearest ice.
7 Mistakes That Ruin Clear Ice — And How to Avoid Them
Mistake 1 — Waiting Too Long
The most common clear ice mistake. If you leave the cooler in the freezer until the entire block is solid, the bottom liquid also freezes cloudy. Check at 18 hours. Stop when the bottom quarter is still liquid.
Mistake 2 — Using the Cooler Lid
The lid must stay off. If you cover the cooler, you insulate the top surface and prevent directional freezing from working. The whole method depends on the top being the only exposed surface.
Mistake 3 — Dropping Ice Directly Into a Warm Glass
Thermal shock — the sudden temperature difference between cold ice and a warm glass — cracks even perfectly made clear ice. Let cubes sit at room temperature for 2 minutes first, or briefly rinse the glass with cold water before adding ice.
Mistake 4 — Thinking Water Quality Is the Only Factor
Water quality helps but is not the main factor. Direction of freezing is everything. People who switch to distilled water in a standard tray and expect clear ice are always disappointed.
Mistake 5 — Cutting Immediately After Removing From Freezer
Extremely cold ice is brittle and shatters rather than cutting cleanly. Let the block sit at room temperature for 3 to 5 minutes before cutting. The outer layer softens slightly and allows clean scoring.
Mistake 6 — Using a Non-Insulated Container
A plastic food storage container in your freezer does not work. It has no insulation — freezing happens from all sides and you get the same cloudy result as a standard tray. You need an actual insulated cooler.
Mistake 7 — Opening the Freezer Frequently
Every time you open the freezer during the 18 to 24 hour process, you introduce warm air and disrupt the slow directional freezing. Set a timer for 18 hours and leave it completely alone until then.
Troubleshooting — When Your Clear Ice Is Not Coming Out Clear
If you followed the cooler method and the results were disappointing, one of the following is almost certainly the cause:
| Problem | Most Likely Cause | Fix |
|---|---|---|
| Entire block is cloudy | Cooler lid was on, or container has no insulation | Remove lid completely; confirm it is an insulated cooler, not a plain plastic container |
| Clear section is only top 20% | Block froze too fast — freezer too cold or cooler too thin | Try a thicker-walled cooler; raise freezer temp slightly toward 5°F |
| Cracks running through the clear section | Temperature stress — cooler removed too quickly or block dropped | Remove cooler gently; let block temper 5 min at room temp before cutting |
| Small cloudy streaks even in clear section | Very high mineral content tap water | Switch to filtered or distilled water for the next batch |
| Block will not slide out of cooler | Froze too solid — no liquid bottom layer remaining | Run warm water over the outside of the cooler for 30 seconds; block will release |
| Ice tastes off or stale | Stored open in freezer — absorbed odors | Always seal cut cubes in a zip-lock bag immediately after cutting |
| Ice cracks when placed in drink | Thermal shock — ice too cold, glass too warm | Temper ice 2 minutes at room temp; rinse glass with cold water before adding ice |
Best Uses for Clear Ice — When It Really Makes a Difference
Whiskey and Spirits on the Rocks
This is where clear ice earns its reputation. A single large clear cube in a whiskey glass melts slowly and evenly over 30 to 45 minutes — long enough to enjoy a pour without it getting diluted. The lack of minerals in the ice means nothing interferes with the spirit’s natural flavor profile. According to Pendleton Whisky’s master blenders, clear ice is the ideal pairing for premium spirits because it preserves flavor integrity while providing controlled cooling.
Classic Cocktails
Old fashioneds, negronis, espresso martinis, margaritas on the rocks — any cocktail served over ice benefits from clear ice. The visual impact is immediate and the slower melt keeps the drink at its intended flavor profile longer.
Photography and Content Creation
If you create food or drink content, clear ice is transformative. A cloudy ice cube in a drink photo looks cheap regardless of what is in the glass. A crystal clear cube turns a simple drink photo into something editorial-quality. This is one of the most underrated uses — your engagement rates on drink photography will visibly improve.
Iced Coffee and Cold Brew
Serious coffee drinkers swear by large clear ice cubes for iced coffee. The slow melt means your cold brew stays concentrated longer — the ice does not water it down as quickly. This is a small thing that makes a genuinely noticeable difference in a quality cup.
Hosting and Entertaining
Clear ice in a home bar setup tells guests you care about what you are serving them. It is a small detail with an outsized impact on how your drinks are perceived. A home bartender with clear ice immediately signals to guests: this person has thought about every element of the experience.
♻️ Don’t Waste the Cloudy Bottom Section: The cloudy ice you cut off is not garbage. It is perfectly good ice — just not beautiful ice. Crush it and use it for smoothies, blended cocktails, iced tea, or water bottles. You paid to freeze that water, so use all of it.
FAQs
Why is my homemade ice always cloudy?
Because it freezes from all sides at once in a standard ice tray. As water freezes inward from every direction, dissolved air bubbles and minerals get trapped in the center with nowhere to escape. The result is a cloudy white core. The fix is not better water — it is controlling the direction of freezing using a method called directional freezing. The cooler method accomplishes this with equipment you already own.
Does boiling water make clear ice?
No — not reliably. Boiling removes some dissolved gases but the ice still freezes from all sides in a standard tray, trapping remaining impurities in the center. You might get marginally clearer ice than cold tap water, but never truly crystal clear. Food scientists confirm that boiling alone does not produce clear ice. Only directional freezing does.
Does distilled water make clear ice?
Not by itself. Distilled water has fewer minerals but if frozen in a standard tray it still traps air bubbles in the center. However, distilled water combined with the cooler method or a clear ice tray mold produces excellent results — significantly better than filtered or tap water with the same method.
How long does it take to make clear ice at home?
Using the cooler method, allow 18 to 24 hours depending on your freezer temperature and water depth. Check at 18 hours — the top two thirds should be clear and frozen, the bottom quarter still liquid. Remove it at this point. Waiting longer risks the cloudy bottom section also freezing solid.
Can a countertop ice maker make clear ice?
Standard countertop bullet ice makers like the EUHOMY, Silonn, or Chefman cannot produce perfectly clear large cubes because their rapid 6-minute freeze cycle does not allow time for impurities to migrate away. However, using filtered or distilled water and keeping the machine clean produces noticeably clearer bullet ice than tap water. For crystal clear large format cubes, the cooler method or a clear ice tray mold remains the best home approach. See our complete countertop ice maker guide for machine recommendations.
What is directional freezing?
Directional freezing is the technique of forcing water to freeze from only one direction — typically from the top downward — instead of from all sides simultaneously. As ice forms downward, it pushes dissolved air and minerals ahead of it into the still-liquid water below. The top portion that froze first contains none of these impurities and is perfectly clear. The bottom liquid section, which contains all the concentrated impurities, is discarded.
What size cooler do I need for the clear ice method?
Any insulated cooler that fits in your freezer works. A small lunchbox-size soft cooler (roughly 6 to 8 inches wide) is ideal because it fits in most freezer drawers without displacing other items. You only need 4 to 5 inches of water depth. Larger coolers produce larger blocks but require more freezer space and the same 18 to 24 hour wait.
How do I cut clear ice without it cracking?
Let the ice block sit at room temperature for 3 to 5 minutes before cutting. Use a serrated knife and score the surface with light back-and-forth strokes rather than trying to cut straight through. Once you have scored a line about half an inch deep, apply gentle pressure and the ice will snap cleanly along the score. Always temper the cut cubes (2 minutes at room temperature) before dropping in a glass to prevent cracking from thermal shock.
The Bottom Line — What Method Should You Use?
For most people at home, the cooler method is the answer. It costs nothing extra, uses equipment you already own, and produces genuinely impressive results.
Here is the quick summary of what works and what does not:
- ✅ Cooler method — Best overall. Crystal clear results. Free to try tonight.
- ✅ Clear ice tray mold — Best for convenience and consistent cube shapes. Worth the $25 to $60 investment if you make drinks regularly.
- ✅ Distilled water + cooler method — Best possible home results. Highly recommended.
- ⚠️ Boiled water alone — Minor improvement. Not worth the effort as a standalone method.
- ⚠️ Distilled water alone in standard tray — Better than tap water but still cloudy. Needs directional freezing to work properly.
- 💡 Countertop ice maker + filtered water — Cannot make bar-quality clear cubes but produces noticeably clearer bullet ice for daily use. Perfect complement to the cooler method.
The best setup for any home that cares about ice quality: a countertop ice maker running filtered water for daily drinks, plus the cooler method ready for the evenings when you want to make something worth showing off.
For more ice making guides, machine reviews, and maintenance tips, visit IceMakerReviews.com — everything you need to know about ice, in one place.
Some links in this article are affiliate links. If you purchase through them we may earn a small commission at no extra cost to you. This helps keep IceMakerReviews.com free and independent. All recommendations are based on genuine testing and research.
Amazon Affiliate
Some links in this article are affiliate links. If you purchase through them we may earn a small commission at no extra cost to you. This helps keep IceMakerReviews.com free and independent. All recommendations are based on genuine testing and research.