Introduction
Picture this: it is 9 PM, you have a house full of guests, and your Samsung refrigerator ice maker has completely frozen over, stopped working, or started leaking water all over your freezer floor. You have already tried the reset button. Nothing. Now you need to know how to remove ice maker in Samsung refrigerator — fast, safely, and without breaking anything.
You are not alone. Ice maker problems are the number one repair issue reported by Samsung refrigerator owners in the United States, and thousands of people search for this exact fix every single month. The good news? With the right steps and a few basic tools, you can remove a Samsung ice maker yourself in about 20 to 30 minutes — no appliance technician needed, and no expensive service call.
This complete guide covers every Samsung model type — French door refrigerators, side-by-side models, and bottom freezer models. It also covers the most frustrating problems people run into: a stuck ice bucket that will not come out, how to turn off the ice maker properly before removal, what to do when the ice maker is frozen solid, and when you might need an ice maker repair kit.
Read every step before you start. The process is straightforward, but skipping steps — especially the safety steps — can damage your refrigerator or, worse, give you an electric shock.
Quick answer: To remove the ice maker from a Samsung refrigerator: unplug the fridge, empty and remove the ice bucket, disconnect the wiring harness, unscrew the 2 to 3 mounting screws, and gently pull the ice maker assembly forward and out. Full step-by-step instructions are below.
Table of Contents
Why You Might Need to Remove Your Samsung Ice Maker
Before you start taking things apart, it is worth understanding why removal is necessary in the first place — and whether you actually need to go all the way to full removal or just need to turn the unit off.
Here are the most common reasons Samsung refrigerator owners need to remove the ice maker:
⦁ The ice maker has completely stopped producing ice after troubleshooting
⦁ Ice is building up and freezing the entire compartment solid
⦁ The ice bucket is stuck and cannot be removed normally
⦁ Water is leaking from the ice maker into the freezer
⦁ The ice maker is making loud grinding or clicking noises
⦁ You want to free up freezer space and no longer need ice from the fridge
⦁ The ice maker needs to be replaced with a new unit
⦁ You need to access the ice maker for a repair kit installation
Understanding your reason matters because it affects what you do after removal. If you are replacing the unit, you will need the correct replacement part for your model. If you just want more freezer space, you can remove it permanently. If it is frozen solid, you may need to defrost it before removal is even possible.
Tools You Need Before You Start
Getting everything ready before you start saves time and prevents frustration halfway through the job. Here is everything you will need:
| Tool | What it is used for | Required? |
|---|---|---|
| Phillips head screwdriver | Removing mounting screws on ice maker | Yes |
| Flat head screwdriver | Releasing plastic clips and tabs | Yes |
| Towel or small tray | Catching water or melting ice | Yes |
| Work gloves | Protecting hands from sharp edges and cold | Recommended |
| Flashlight or phone torch | Seeing clearly inside the freezer compartment | Recommended |
| Hair dryer or steamer | Defrosting if ice maker is frozen solid | If frozen |
| Ice maker repair kit (model specific) | If replacing rather than just removing | If replacing |
One important note on model numbers: Samsung makes many different refrigerator models, and some steps vary slightly between them. The overall process described in this guide works for the majority of Samsung French door, side-by-side, and bottom freezer refrigerators. If you notice anything looks different from what is described, check your user manual or look up your specific model number on Samsung’s support website.
Step 1 — Safety First: Turn Off and Unplug the Refrigerator
This is the most important step of the entire process. Never skip it, no matter how experienced you are with home repairs.
- Unplug the refrigerator from the wall outlet. Do not just turn it off using the control panel — physically unplug it. This removes all electrical power and prevents any risk of electric shock when you disconnect the wiring harness from the ice maker.
- Turn off the water supply line if your refrigerator is connected to a water line. Look behind the fridge for a small shut-off valve and turn it clockwise until it stops. This prevents water from dripping or spraying when you disconnect the ice maker.
- Turn off the ice maker before unplugging (if the fridge is still working). Press and hold the Ice Off button for 3 seconds until the Ice Maker Off indicator light comes on. This stops the ice maker cycle and makes removal much cleaner and safer.
- Wait 5 minutes after unplugging before you begin working inside. This allows any residual electrical charge to dissipate from the control board.
Safety reminder: The inside of the ice compartment stays extremely cold even after unplugging. Wear gloves when reaching inside. Do not touch any wiring with wet hands.
Step 2 — Remove the Ice Bucket First
Before you can access the ice maker assembly itself, you need to remove the ice bucket (also called the ice bin or ice tray, depending on your model). This is usually the first point where people run into trouble — especially if the ice has clumped or the bucket is frozen in place.
For most French door Samsung models (Ice Master / Ice Max):
- Open the refrigerator compartment and locate the ice bucket on the upper left side. It may have ‘Ice Master’ or ‘Ice Max’ printed on the front.
- Hold the bucket with both hands — one hand under the bottom, one hand on the side. This is important. Samsung specifically warns that you should never grip just the handle, as the weight of ice can cause the bucket to slip and fall.
- Lift up slightly, then pull the bucket straight forward and out. Do not twist or angle it — it slides straight out on a rail.
- Empty any remaining ice into your sink before setting the bucket aside.
For side-by-side and bottom freezer models:
- Open the freezer door and locate the ice bucket — usually in the upper section of the freezer compartment.
- Lift the front of the bucket slightly upward then pull it straight out toward you.
- If there is resistance, check for a retaining clip on the side of the bucket. Press the clip inward while pulling the bucket forward.
Ice bucket stuck in Samsung refrigerator — what to do
This is one of the most common problems people face. If you cannot remove the ice bucket from your Samsung refrigerator, here is why it happens and how to fix it:
⦁ Ice has clumped and frozen around the bucket edges — this almost always happens after a power outage or if the Ice Off mode was not activated before leaving ice in the bucket
⦁ The helix (auger mechanism) inside the bucket is misaligned — try rotating it 90 degrees and then pull again
⦁ The ice maker has frozen over completely — the bucket may be physically frozen to the housing.
The fix for a frozen-stuck ice bucket: do NOT force it. Forcing the bucket can crack the plastic housing or break the auger arm. Instead, use a hair dryer on the lowest heat setting — hold it about 6 to 8 inches away and gently warm the edges of the bucket for 2 to 3 minutes. The ice will loosen and the bucket will slide out cleanly. Alternatively, unplug the refrigerator, leave both doors open, and allow the freezer to naturally defrost for 30 to 60 minutes.
Step 3 — How to Turn Off Ice Maker in Samsung Refrigerator (Before or After Removal)
Many people want to turn off the Samsung fridge ice maker without fully removing it — either to stop ice production temporarily or to prepare for removal. Here is how to do it for every Samsung model type:
| Samsung model type | How to turn off ice maker | Button / method |
|---|---|---|
| Most French door models (2018+) | Press and hold Ice Off for 3 sec | Ice Off button (control panel) |
| BESPOKE dual ice maker models | Turn off each separately (Cubes & Bites) | Ice type buttons (panel) |
| Side-by-side models | Press until indicator turns off | Ice Maker button (dispenser) |
| Older models (pre-2018) | Lift shut-off arm to UP position | Manual wire arm (inside freezer) |
| Models with LCD touchscreen | Go to Settings → Ice Maker → Off | Button/method |
After turning off the ice maker on your Samsung fridge, always remove all ice from the bucket. Samsung specifically states: if you leave ice in the bucket after activating Ice Off mode, the remaining cubes can clump together and freeze into a single block, which then makes the bucket impossible to remove without force or defrosting.
Step 4 — Remove the Ice Tray
On many Samsung models, there is a separate ice tray beneath or behind the ice maker assembly. This needs to come out before you can access the mounting screws.
- Look for the ice tray directly below the ice maker unit — it is a flat, rectangular plastic tray that collects drips and water overflow.
- Slide the tray out by pulling it straight forward. On some models, it has a small lip at the front — press down on the lip and pull.
- On Samsung models with a twist-lock ice tray (like the RF24R series), twist the tray counterclockwise to unlock it, then pull it forward.
- Empty and rinse the tray in your sink. You will notice mineral deposits or old ice fragments — this is normal and a good reason to clean this area regularly.
Step 5 — Disconnect the Wiring Harness
This is the step where the actual ice maker assembly begins to come apart. The wiring harness is the electrical connector that links the ice maker to the refrigerator’s control board. It must be disconnected before you remove the mounting screws.
- Look for the wiring harness on the back or side of the ice maker assembly — it is a small plastic connector with wires coming out of it, clipped to the wall of the freezer.
- Use your fingers to squeeze the locking tab on the side of the connector. While squeezing, rock the connector gently side to side and pull it straight out. Do not yank it — the connector should release smoothly.
- Guide the wire out of any wall clips that hold it in place along the freezer wall. These are small plastic hooks — use a flat head screwdriver to gently pop them open.
- If your model has a water line connector, you will see a small water tube connected to the back of the ice maker. Use pliers to gently squeeze the retaining clip on the water line and pull the tube free. Have your towel ready — a small amount of residual water may drip out.
Important: Never pull the wiring harness out by the wires themselves. Always grip and squeeze the plastic connector body. Pulling on the wires can break the internal connections and cause a much more expensive repair.
Step 6 — Unscrew the Mounting Screws and Remove the Ice Maker
Now you are ready to actually remove the ice maker assembly from the refrigerator. This is the step that varies most between models.
For Samsung French door refrigerators (ice maker in refrigerator compartment):
- Look for a plastic clip at the top front of the ice maker assembly that clips it to the ceiling of the ice compartment. Use your fingers to press and release this clip — it is stiff and may require firm pressure.
- Once the clip is released, pull the ice maker assembly straight forward and out. It slides on rails — do not twist or angle it.
- On some models, there is an air tunnel flap held by one screw and a plastic clip. Remove the screw first, then pry the clip with a flat head screwdriver to release the flap. This gives you access to the main mounting screws behind it.
- Remove the 2 or 3 Phillips head screws securing the ice maker to the freezer wall. Keep them in a safe place.
- Gently pull the ice maker assembly forward about 1 inch, then angle it slightly downward to clear the mounting bracket. Lift it out carefully.
For Samsung side-by-side refrigerators:
- Open the freezer door and locate the ice maker in the upper section of the freezer.
- Find the plastic release lever or tab at the front top of the ice maker — above the unit, clipped to the ceiling. Press down on this tab using a flat-head screwdriver while simultaneously pulling the ice maker straight forward.
- The ice maker slides forward on a rail. Once it is about halfway out, support it with one hand while it clears the housing.
- If there are mounting screws (some side-by-side models have 2 screws at the top and bottom), remove these before pulling the unit forward.
For Samsung bottom freezer models:
- Open the bottom freezer drawer and pull it all the way out.
- Locate the ice maker assembly in the upper rear of the freezer compartment.
- Remove the 2 to 3 Phillips screws on the mounting bracket.
- Disconnect the wiring harness (if not already done in Step 5), then pull the ice maker forward and lift it out.
Stuck ice maker tip: If the ice maker will not budge even after removing all screws and disconnecting the harness, it is likely frozen to the back wall. Apply warm air from a hair dryer to the area around the unit for 2 to 3 minutes, then try again. Never use a sharp tool to pry it free — you can puncture the refrigerant coil, which is a very serious and expensive problem.
Step 7 — Inspect, Replace, or Leave Out
With the ice maker out of the refrigerator, you now have a clear view of the unit and the cavity it sat in. Here is what to do next, depending on your situation:
If you are replacing the ice maker:
Check the model number printed on the ice maker assembly label. You will need an exact replacement for your model. The most common Samsung replacement ice maker part numbers include DA97-15217D, DA97-07549B, and DA97-12317A — but always confirm using your refrigerator model number before ordering. Reverse all the steps above to install the new unit.
If you need an ice maker repair kit:
If your Samsung refrigerator was manufactured before 2019, there is a known design flaw in the ice maker control board that causes repeated freezing and failure. Samsung released an ice maker repair kit (also called an ice maker service kit) that includes an updated control board to fix this problem permanently. This kit costs significantly less than a full ice maker replacement and is widely available online. When ordering, confirm compatibility with your specific model number.
If you are removing it permanently for more freezer space:
Cap the water supply line with a small plug or clamp to prevent any drips. Tuck the wiring harness safely to the side using a cable tie. The empty cavity can be used for extra freezer storage — just be aware that your refrigerator may show an error code related to the ice maker on the display panel. Check your user manual for how to disable the ice maker error on your specific model.
How to Reinstall the Samsung Ice Maker
If you are putting the ice maker back in after cleaning, repair, or replacement, simply reverse the removal steps:
- Slide the ice maker assembly back into the housing and align it with the mounting bracket
- Insert and tighten the mounting screws — do not overtighten or you will crack the plastic housing
- Reconnect the wiring harness until you hear or feel a click
- Reconnect the water line if applicable
- Slide the ice tray back into position
- Replace the ice bucket — push it firmly straight in until it seats completely
- Turn the water supply line back on
- Plug the refrigerator back in
- Turn the ice maker on using the Ice On button or by lowering the wire shut-off arm
- Wait 24 hours for the first batch of ice — the first 2 to 3 batches should be discarded as the system clears any air from the water line.
Reinstallation tip: If the ice bucket does not fit back in after reinstallation, do not force it. Turn the helix (the auger spiral inside the bucket) 90 degrees and try again. This is the most common reinstallation problem, and it has a very easy fix.
FAQs
Can I remove the ice maker from my Samsung refrigerator without a technician?
Yes, absolutely. Learning how to remove ice maker in Samsung refrigerator is a manageable DIY task for most homeowners. As long as you unplug the refrigerator first and follow the steps carefully, there is no need to pay for a service call. Most people complete the removal in 20 to 30 minutes on their first attempt.
Why can I not remove the ice bucket from my Samsung refrigerator?
The most common cause is that ice has clumped and frozen around the bucket, locking it in place. This often happens after a power outage or if the ice maker was left running in Ice Off mode. The solution is to gently warm the edges of the bucket with a hair dryer on low heat for 2 to 3 minutes, then try again. Never force the bucket — you will crack the housing.
How do I turn off the ice maker in my Samsung fridge without removing it?
On most Samsung models, press and hold the Ice Off button on the control panel for 3 seconds until the indicator light comes on. On older models with a wire arm, lift the arm to the UP position. Always remove all ice from the bucket after turning it off to prevent clumping.
How do I remove the ice maker from a Samsung bottom freezer refrigerator?
Open the bottom freezer drawer fully. Locate the ice maker in the upper rear of the freezer compartment. Disconnect the wiring harness, remove the 2 to 3 mounting screws, and pull the unit forward and out. The process is slightly more awkward than French door models because of the drawer design, but the mechanism is the same.
How do I remove the ice maker from a Samsung side-by-side refrigerator?
Open the freezer door and find the ice maker in the upper section. Press down on the plastic release tab at the top front of the unit using a flat head screwdriver, then pull the ice maker straight forward. Some side-by-side models also have 2 mounting screws that must be removed first.
Final Thoughts
Knowing how to remove ice maker in Samsung refrigerator can save you a significant amount of money on appliance repair bills. Whether you are dealing with a frozen ice maker, a stuck ice bucket, a leaking unit, or simply want to reclaim your freezer space, the steps in this guide give you everything you need to complete the job safely and confidently.
The key points to remember: always unplug first, never force a stuck ice bucket, and use warm air rather than sharp tools if anything is frozen. If you are replacing rather than just removing, always match the part number to your exact model before ordering.
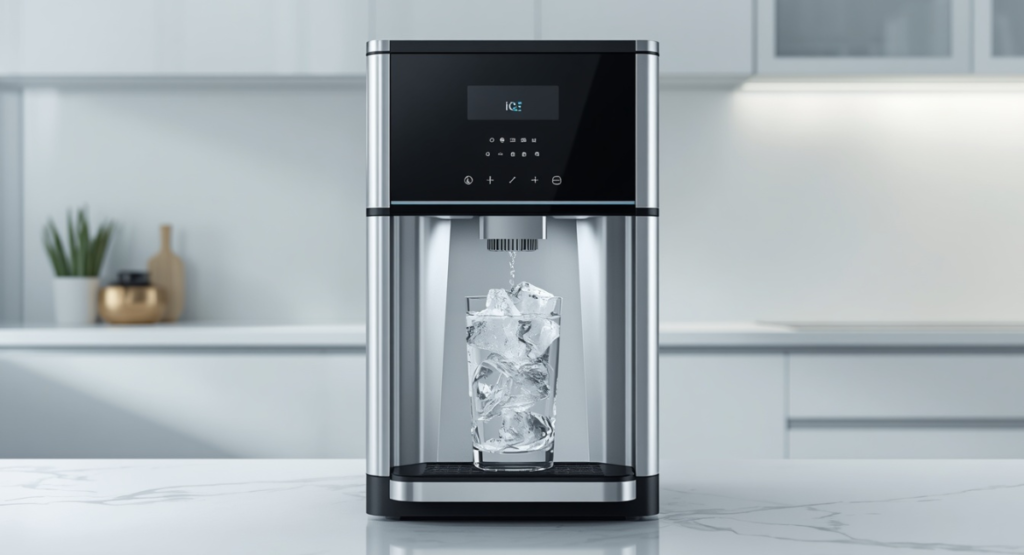
If after removal you find that the ice maker cavity is now empty and you miss having fresh ice on demand, a countertop ice maker is a great alternative — it gives you fresh ice in just 6 to 15 minutes, no plumbing required, and none of the reliability headaches that come with built-in refrigerator ice makers. Check our full countertop ice maker reviews for the best models available in 2026.