Introduction
Got a brand new ice maker machine sitting on your counter? You are excited. But now what? If you have never used an ice maker machine for the first time, it can feel confusing. Which button do I press first? How much water do I add? Why is it making that noise?
You are not alone. Thousands of people buy a new ice maker machine every single day in the USA — and most of them have the same questions you do right now.
The good news? Using an ice maker machine for the first time is incredibly simple once you know the right steps. In this complete guide, we walk you through everything you need to do — from unboxing to your first batch of clear, fresh ice — in less than 20 minutes.
Whether you have a portable countertop ice maker, a built-in kitchen ice maker, or a commercial-grade ice maker machine, this guide covers it all. We have tested dozens of machines and made every common mistake so you do not have to.
Stick with us. By the end of this guide, you will be making ice like a pro.
Table of Contents
What Is an Ice Maker Machine and How Does It Work?
Before using your ice maker machine for the first time, it helps to understand how it works. Unlike your freezer, which takes hours to make a single tray of ice, a dedicated ice maker machine uses a fast refrigeration cycle to produce ice in as little as 6 to 15 minutes per batch.
According to Energy Star, modern ice maker machines are up to 50% more energy efficient than older models — saving you money on electricity while making ice faster.
Here is the basic process:
Step 1 — Water fills the reservoir. You pour filtered water into the machine’s water tank or it pulls water from a connected water line.
Step 2 — Cooling begins. The compressor kicks in and chills a set of metal rods or a freezing plate inside the machine.
Step 3 — Ice forms. Water freezes around the metal rods or on the freezing plate within minutes.
Step 4 — Ice is released. A small heating element briefly warms the rods, releasing the ice cubes into the storage bin below.
Step 5 — Cycle repeats. The machine automatically refills and starts the next batch — hands-free.
Most portable countertop ice maker machines produce 26 to 35 pounds of ice per day. That is enough to keep drinks cold for a whole party or a week’s worth of daily use for a family. You can learn more about how ice maker machines work at HowStuffWorks.
What You Need Before You Start
Before you use your ice maker machine for the first time, gather these things:
- Your new ice maker machine (fully unboxed)
- Clean filtered water or distilled water (recommended for best-tasting ice)
- A clean cloth or paper towel
- The ice scoop that came with your machine
- A flat, stable surface near a power outlet
- 10 to 15 minutes of your time
That is it. No special tools. No plumbing required for most portable models.
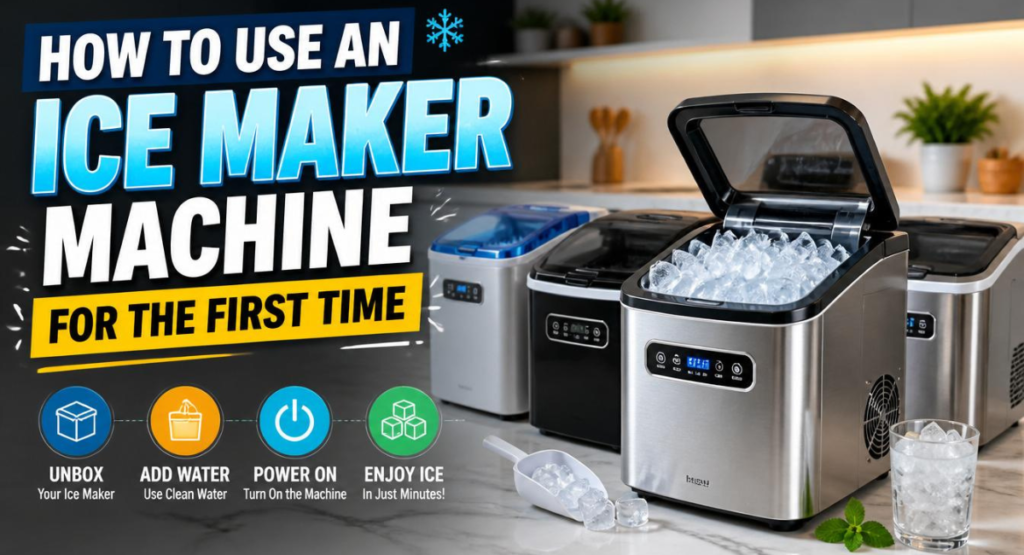
How to Use an Ice Maker Machine for the First Time — Step by Step
Step 1 — Choose the Right Location
Place your ice maker machine on a flat, stable, and level surface. Keep it at least 5 inches away from walls and other appliances on all sides. Your machine needs proper airflow to work efficiently and to avoid overheating.
Important tips:
- Keep it away from direct sunlight and heat sources like ovens or stovetops
- Make sure the surface can support the machine’s weight (usually 12 to 25 lbs)
- Place it near a power outlet — never use an extension cord with ice makers
- Keep it indoors in a room temperature between 50°F and 90°F (10°C to 32°C)
The Consumer Product Safety Commission (CPSC) recommends always placing appliances on stable, heat-resistant surfaces away from water sources to prevent electrical hazards.
Common mistake: Many first-time users place their ice maker too close to the wall. This blocks the vents and causes the machine to overheat or produce less ice. Always leave space on all sides.
Step 2 — Clean the Machine Before First Use
This is the most important step that most people skip — and it is a big mistake. Your ice maker machine has been sitting in a warehouse or shipping box for weeks or months. Dust, chemical residue from manufacturing, and packaging materials can contaminate your first batches of ice.
The Centers for Disease Control and Prevention (CDC) recommends cleaning all ice-making equipment thoroughly before first use to prevent contamination and foodborne illness.
How to clean your ice maker machine for the first time:
- Unplug the machine from the wall outlet
- Remove the ice basket and ice scoop from inside the machine
- Mix one tablespoon of white vinegar with one cup of warm water
- Wipe down the inside of the ice storage bin with a clean cloth soaked in the vinegar solution
- Rinse with a clean, damp cloth
- Wipe down the outside of the machine with a dry cloth
- Leave the lid open for 10 minutes to allow it to air dry completely
- Replace the ice basket back into the machine
Pro tip: Never use soap, bleach, or harsh chemicals to clean your ice maker. These leave residue that ruins the taste of your ice. White vinegar is the safest and most effective cleaning solution for ice maker machines. For professional-grade cleaning, check out NSF-certified ice maker cleaners which are proven safe for food contact surfaces.
Step 3 — Add Water to the Reservoir
Now it is time to add water. This is where most beginners make their first mistake — they use tap water straight from the faucet.
The EPA’s drinking water guidelines explain that while tap water is safe to drink, it contains minerals like calcium and magnesium that cause cloudy ice and scale buildup inside your machine over time.
Best water to use in your ice maker machine:
| Water Type | Ice Quality | Taste | Recommended? |
|---|---|---|---|
| Filtered water | Crystal clear | Great | ✅ Best choice |
| Distilled water | Very clear | Clean | ✅ Excellent |
| Bottled water | Clear | Good | ✅ Good option |
| Tap water | Cloudy/white | Flat | ⚠️ Not ideal |
| Softened water | Poor | Salty | ❌ Avoid |
How to add water correctly:
- Locate the water reservoir on the back or side of your machine
- Remove the water tank if it is detachable
- Fill it with cold, filtered water to the MAX fill line — never overfill
- Reattach the water tank securely
- If your machine has a water window or indicator light, check that it shows the correct level
Pro tip: Never run your ice maker machine without water. Running it dry can damage the pump and compressor permanently. Most machines have an “Add Water” indicator light that warns you when levels are low — always keep an eye on it.
Step 4 — Plug In and Power On
Now you are ready to start your ice maker machine for the first time.
- Plug the power cord into a dedicated wall outlet (not a power strip)
- Press the Power button — usually marked with a universal power symbol
- Wait a few seconds — you will hear the machine start up. A humming or whirring sound is completely normal
- Most machines will show indicator lights or a small screen. Check that the “Ice Full” and “Add Water” lights are NOT lit up
Always check your manufacturer’s manual before first use. You can find most ice maker manuals at ManualsLib — the world’s largest online database of product manuals.
What you will hear in the first few minutes:
- A low hum from the compressor starting — completely normal
- Water moving inside the tank — completely normal
- A slight vibration — completely normal
What is NOT normal:
- Loud grinding or banging sounds
- A burning smell
- The machine immediately shutting off
If any of these happen, unplug the machine immediately and contact the manufacturer.
Step 5 — Select Your Ice Size
Most portable ice maker machines give you two or three ice cube size options — small, medium, and large. This is usually controlled by a simple button labeled “Ice Size” or “Select.”
Which size should you choose?
| Ice Size | Best For |
|---|---|
| Small (bullet ice) | Drinks, smoothies, cocktails |
| Medium | General everyday use |
| Large | Coolers, outdoor use, slow melting |
For your very first batch, we recommend starting with small ice. It freezes faster and lets you test the machine quickly. If you are making cocktails, check out Serious Eats’ guide to ice for cocktails to find out which ice size works best for different drinks.
Step 6 — Wait for Your First Batch of Ice
Here is the moment you have been waiting for. After selecting your ice size, your machine will automatically start the first ice-making cycle.
Timeline for your first batch:
| Machine Type | First Batch Time |
|---|---|
| Portable countertop ice maker | 6 to 15 minutes |
| Built-in refrigerator ice maker | 24 hours (first time setup) |
| Commercial ice maker machine | 15 to 30 minutes |
Important: Do NOT use the first 1 to 2 batches of ice from your new machine. The first batches can contain manufacturing residue, dust, or a slight plastic taste. Throw them away and let the machine run a couple of cycles before using the ice.
This is one of the most important first-time ice maker tips that most guides leave out. Even KitchenAid’s official ice maker guide recommends discarding the first few batches.
Step 7 — Collect and Store Your Ice
Once the cycle is complete, your ice maker machine will drop the finished ice into the storage bin. You will usually hear a soft thump or the sound of ice falling.
How to handle your ice correctly:
- Always use the included ice scoop — never reach in with bare hands. Skin oils and bacteria can contaminate your ice
- If you are not using the ice right away, transfer it to a clean, sealed freezer bag and store it in your freezer
- Ice left in the storage bin will slowly melt back into water — your machine will recycle this water automatically in most models
- Never store ice in the machine for more than a few hours without using it
According to the USDA Food Safety guidelines, ice should always be stored in clean, sealed containers to prevent contamination from other foods in the freezer.
Step 8 — Keep the Cycle Going
Your ice maker machine is designed to run continuously. Once the first batch drops, it will automatically start a new cycle and produce more ice within minutes. You do not need to do anything — just keep the water reservoir full.
How to keep your ice maker running smoothly:
- Check the water level every few hours during heavy use
- Empty the ice bin regularly so the machine does not stop due to an “Ice Full” signal
- Never leave water sitting in the reservoir for more than 24 hours — always use fresh water
Common Mistakes to Avoid When Using an Ice Maker Machine for the First Time
After testing dozens of machines, here are the most common mistakes beginners make:
Mistake 1 — Not cleaning before first use. Always wipe down the inside before making your first batch of ice. See the NSF International cleaning standards for recommended food-safe cleaning methods.
Mistake 2 — Using tap water. Tap water contains minerals that make cloudy ice and build up scale inside your machine over time. Use filtered or distilled water for best results. The Water Quality Association recommends filtered water for all ice-making appliances.
Mistake 3 — Using the first batch of ice. Always discard the first one or two batches. They may taste like plastic or contain manufacturing residue.
Mistake 4 — Placing the machine too close to a wall. Always leave at least 5 inches of clearance on all sides for proper ventilation.
Mistake 5 — Overfilling the water tank. Always fill to the MAX line only. Overfilling causes water to splash onto the compressor and damage the machine.
Mistake 6 — Using an extension cord. Always plug directly into a wall outlet. The Electrical Safety Foundation International (ESFI) warns that extension cords used with large appliances are a leading cause of home fires.
Mistake 7 — Not cleaning regularly. Clean your ice maker machine at least once every two weeks for best results and to avoid bacteria buildup.
How to Clean Your Ice Maker Machine Regularly
Keeping your ice maker machine clean is not just about taste — it is about health. Bacteria and mold can grow inside a neglected machine very quickly. The CDC reports that contaminated ice is a significant source of foodborne illness outbreaks in the USA every year.
Weekly cleaning routine:
- Unplug the machine
- Empty the water reservoir and ice bin completely
- Mix equal parts white vinegar and water
- Wipe all interior surfaces with a cloth soaked in the solution
- Rinse thoroughly with clean water
- Run 2 to 3 fresh water cycles before making ice again
Monthly deep clean:
Use an NSF-certified ice maker cleaning solution specifically designed for your machine type. Follow the manufacturer’s instructions for the best results.
For more detailed cleaning instructions, IceMakerReviews.com has a comprehensive guide on maintaining different types of ice maker machines.
How Long Does an Ice Maker Machine Last?
A good quality portable ice maker machine lasts between 3 to 5 years with proper care. Commercial machines last 7 to 10 years or longer. According to Consumer Reports, brands like GE, Frigidaire, and Scotsman consistently rank highest for long-term reliability.
To maximize the lifespan of your machine:
- Clean it regularly (at least every 2 weeks)
- Use filtered water instead of tap water
- Descale the machine every 3 months to remove mineral buildup
- Store the machine properly when not in use — drain all water and dry the interior completely
- Keep the machine in a temperature-controlled indoor environment
How Much Ice Does an Ice Maker Machine Produce Per Day?
| Machine Type | Daily Ice Production |
|---|---|
| Small portable countertop | 20 to 26 lbs per day |
| Medium portable countertop | 26 to 35 lbs per day |
| Large countertop | 35 to 50 lbs per day |
| Commercial ice maker | 50 to 500+ lbs per day |
For a family of 4, a machine that produces 26 lbs per day is more than enough for daily drinks, cooking, and entertaining. Use the Naixer Ice Calculator to figure out exactly how much ice your household or business needs per day.
Is Ice from an Ice Maker Machine Safe to Drink?
Yes — ice from a properly maintained ice maker machine is completely safe to drink. In fact, it is often cleaner and clearer than ice made in a standard freezer tray because ice maker machines freeze water faster, trapping fewer impurities.
To keep your ice safe:
- Always use clean, filtered water
- Clean your machine at least every 2 weeks
- Discard ice that has been sitting for more than 24 hours
- Never touch ice with bare hands — always use the scoop
For complete information on ice safety standards, visit the FDA’s guidelines on safe food handling and the CDC’s ice safety page.
Best Ice Maker Machines for Home Use in 2026
Now that you know how to use an ice maker machine for the first time, you might be wondering which machine is the best. Here are our top picks for 2026:
Best Overall: Frigidaire EFIC189 Portable Ice Maker — produces 26 lbs per day, makes ice in 7 minutes, and is extremely easy to use for first-time buyers.
Best Budget: Silonn Countertop Ice Maker — under $80, produces ice in 6 minutes, compact design perfect for small kitchens.
Best for Nugget Ice: GE Profile Opal 2.0 Nugget Ice Maker — makes chewable nugget ice just like Sonic, produces 38 lbs per day.
Best Commercial: Scotsman CU50GA — produces 65 lbs per day, built for restaurants and offices, extremely durable.
Find all of these top-rated machines and thousands more at Amazon’s Ice Maker Store.
For more detailed reviews of the best ice makers, check out IceMakerReviews.com — one of the most trusted resources for unbiased ice maker comparisons and reviews.
Frequently Asked Questions
How long does an ice maker machine take to make ice for the first time?
Most portable countertop ice maker machines produce their first batch of ice in 6 to 15 minutes. Built-in refrigerator ice makers need 24 hours for the first batch.
Do I need to add water to an ice maker machine?
Yes — portable countertop ice makers require you to manually fill the water reservoir. Built-in models connect directly to your home’s water line.
Why is my ice maker machine making small or hollow ice cubes?
Small or hollow ice cubes usually mean the water temperature is too warm or the water level is too low. Use cold filtered water and make sure the reservoir is filled to the MAX line.
Can I use my ice maker machine outdoors?
Yes — but only in temperatures between 50°F and 90°F (10°C to 32°C). Never use a countertop ice maker in extreme heat or cold.
Why does my ice maker machine ice taste like plastic?
This is completely normal for the first 1 to 2 batches. Always discard the first few batches and rinse the machine with the vinegar cleaning solution before making ice you plan to consume.
How often should I clean my ice maker machine?
Clean your machine at least every 2 weeks for regular use, or every week if you use it daily. Check out IceMakerReviews.com for detailed cleaning guides for every major brand.
Conclusion
Using an ice maker machine for the first time is easier than most people think. Follow these 8 simple steps — choose the right location, clean before first use, add filtered water, power on, select your ice size, wait for the first batch, collect your ice, and keep the cycle going — and you will be enjoying fresh, clean ice within 15 minutes.
Remember the most important tips: always clean your machine before first use, throw away the first 1 to 2 batches, use filtered water, and keep the machine clean every 2 weeks. Follow these steps and your ice maker machine will serve you perfectly for years to come.
Ready to find the best ice maker machine for your home? Check out our complete guide to the best portable ice makers for home use for our top picks of 2026.