Troubleshooting By Ice Maker Reviews · Updated September 2026 · 10 min read
You pressed the self-clean button. Nothing happened. Or maybe it started, ran for a minute, and then just… stopped. Or worse — you ran a full self-clean cycle and the ice still smells off, tastes like plastic, or has that cloudy look that makes you second-guess putting it in your drink.
If any of that sounds familiar, you are not dealing with a broken machine — at least not yet. The self-cleaning function on Igloo countertop ice makers is a genuinely useful feature, but it depends on a few conditions being met exactly right, and most of the time when it “isn’t working,” the real problem is something small and fixable.
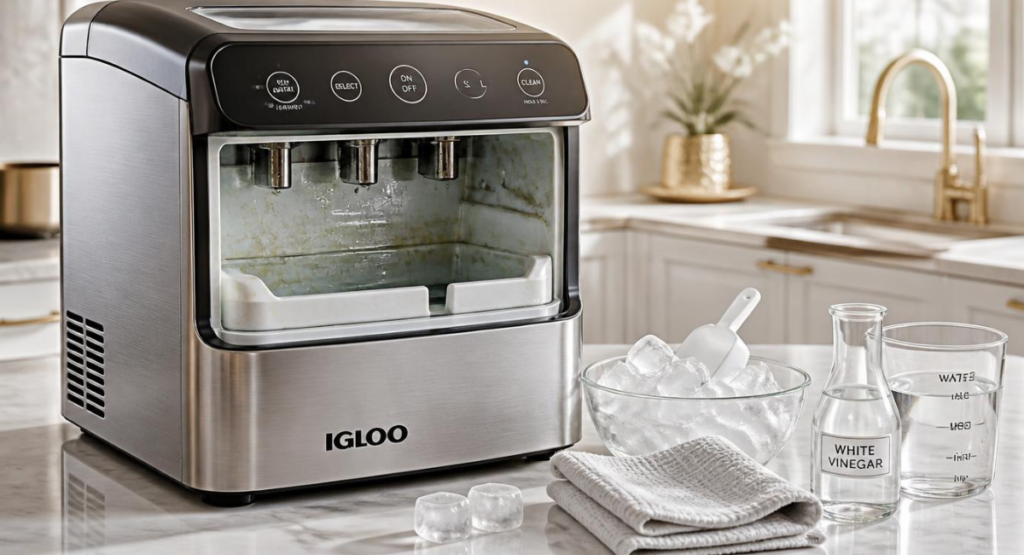
This guide walks through exactly why the self-clean function fails, how to fix it step by step, and how to manually deep clean your machine when the automatic feature simply won’t cooperate. Whether you’re dealing with an Igloo ice maker clean button not working, an Igloo self-clean cycle stuck mid-way, or you’re simply trying to figure out how to clean an Igloo ice maker without the self-clean feature at all, the fixes below cover every version of this problem across the ICEB26, ICEB26HNSS, ICEB26HNAQ, and IGLICEBSC26 model lines.
- How the Igloo Self-Cleaning Function Is Supposed to Work
- 7 Real Reasons Your Self-Clean Isn’t Working
- Step-by-Step: Manual Deep Clean When Self-Clean Fails
- How to Reset Your Igloo Ice Maker First
- Signs Self-Cleaning Is Actually Working
- How Often Should You Run It?
- When to Contact Igloo Support
- How to Prevent This From Happening Again
- Frequently Asked Questions
- Final Verdict
How the Igloo Self-Cleaning Function Is Supposed to Work
Before troubleshooting anything, it helps to know what “working correctly” actually looks like. Igloo’s self-cleaning countertop models — including the ICEB26HNAQ, ICEB26HNSS, and IGLICEBSC26 series — use an automatic multi-stage cycle designed to flush and sanitize the internal water lines and evaporator without you having to take the machine apart.
The Multi-Cycle Process, Explained
The self-clean function typically runs through 5 internal cycles over roughly 10 to 20 minutes. During this process, water is pumped through the internal lines and over the evaporator fingers repeatedly, which helps loosen mineral deposits and flush out residue that builds up from regular ice production. It is not a substitute for occasionally wiping down the ice basket and exterior by hand, but it does most of the internal heavy lifting automatically.
How to Start It Correctly
7 Real Reasons Your Self-Clean Isn’t Working
You’re Not Following the Correct Button Sequence
This is the single most common cause. The clean function requires a press-and-hold action of several seconds while the unit is in standby — not running an ice cycle. If you press it while ice is being made, or tap it briefly instead of holding it, the cycle will not start. Power the unit fully off (standby), then try the hold sequence again.
Water Reservoir Isn’t Filled to the Right Level
The self-clean cycle needs enough water in the reservoir to actually circulate through the internal lines. If the tank is empty or below the minimum fill line, the machine’s water sensor may prevent the clean cycle from starting at all, or it may start and immediately stop.
Mineral Buildup Is Blocking the Water Sensor
If you use hard tap water regularly, mineral scale can accumulate on the water level sensor inside the reservoir. A coated or dirty sensor can misread the water level, causing the machine to think the tank is empty even when it is full — which blocks the clean cycle from initiating.
The Drain Plug Is Clogged or Missing
Most Igloo countertop models have a small silicone drain plug on the underside of the unit. If this plug is missing, cracked, or clogged with old residue, water can leak out during the clean cycle or fail to circulate properly, causing the cycle to stall partway through.
The Unit Thinks It’s Still Mid-Ice-Cycle
If you interrupt a regular ice-making cycle and immediately try to start the clean function, the internal logic board can sometimes get stuck between states. The fix here is usually a full power cycle: unplug the unit completely, wait a few minutes, then plug it back in before trying the clean sequence.
A Sensor or Firmware Glitch Needs a Hard Reset
Like most small appliances with digital control boards, Igloo ice makers occasionally get stuck in an odd state after a power fluctuation or extended use. A full reset — unplugging for 30 minutes, draining all water, and starting fresh — resolves this in most cases. Full reset steps are covered in the next section.
The Self-Clean Feature Has Genuinely Failed (Hardware Issue)
If you have tried the correct sequence, confirmed the water level, checked the drain plug, and performed a full reset — and the clean cycle still will not initiate or complete — you may be dealing with a failed internal component, such as the water pump or control board. At this point, manual cleaning becomes your reliable fallback while you pursue a warranty claim or replacement part.
Step-by-Step: Manual Deep Clean When Self-Clean Fails
The good news is that the self-clean function is a convenience, not a necessity. You can achieve the same result — and often a more thorough one — by cleaning the unit manually. Here is the full process:
How to Reset Your Igloo Ice Maker First
Before assuming the worst, always try a full reset — it resolves a surprising number of “broken” self-clean issues, especially ones caused by the control board getting stuck between states.
Signs Self-Cleaning Is Actually Working (vs Just Running)
Sometimes the cycle appears to run but you are not sure if it actually accomplished anything. Here is what a genuinely successful clean cycle looks like:
- The CLEAN indicator light stays illuminated for the full duration (typically 10–20 minutes) and then turns off or changes state on its own — it should not shut off within the first minute or two.
- You can hear the water pump actively circulating water during the cycle — a faint humming or water movement sound is normal.
- After the cycle, the water in the reservoir looks slightly different (if you used vinegar) or the reservoir walls feel noticeably smoother if you run a finger along them.
- The next few batches of ice come out clear and odor-free rather than cloudy or smelling faintly of plastic or mustiness.
If the light shuts off within seconds of starting, or you hear no pump activity at all, the cycle likely did not run properly — even if the button press seemed to register.
How Often Should You Run the Self-Clean Cycle? (Igloo Ice Maker Cleaning Schedule)
| Usage Pattern | Recommended Frequency |
|---|---|
| Daily household use, soft/filtered water | Every 2–3 weeks |
| Daily household use, hard tap water | Weekly |
| Occasional or seasonal use | Before first use each season, plus monthly if in regular use |
| Heavy use (parties, home bar, RV trips) | Every 1–2 weeks |
If you notice cloudy ice, a musty smell, or slower ice production before your scheduled cleaning is due, clean it immediately rather than waiting — these are early warning signs of mineral buildup or bacterial growth that get worse the longer they sit.
When to Stop Troubleshooting and Contact Igloo Support
If you have worked through the reset process, confirmed correct button sequence and water levels, checked the drain plug, and manually cleaned the unit — but the self-clean function still will not activate at all (no light, no pump sound, no response whatsoever) — this points to a hardware failure rather than a user error.
At that point:
- Check whether your unit is still within its warranty period — most Igloo countertop ice makers carry a limited warranty typically covering manufacturing defects for a set period from purchase date.
- Keep your proof of purchase and model number handy (found on a label on the back or bottom of the unit).
- Contact Igloo customer support directly through their official channel with a clear description of the steps you have already tried — this speeds up the resolution process significantly.
- In the meantime, the manual cleaning method above remains fully effective as a workaround, so the machine can stay in use while you sort out warranty support.
How to Prevent This From Happening Again
- Use filtered or bottled water when possible. Hard tap water is the single biggest driver of sensor and pump issues in countertop ice makers over time.
- Don’t skip the fill-level check. Get in the habit of confirming the reservoir is properly filled before starting any cycle — clean or regular.
- Drain the unit if it will sit unused for more than a few days. Standing water breeds bacteria and accelerates scale buildup even when the machine is off.
- Stick to a cleaning schedule rather than waiting for problems to appear — prevention is far less work than troubleshooting a stuck cycle later.
- Keep the drain plug in a consistent, memorable spot during cleaning so it doesn’t go missing — this is a surprisingly common and avoidable problem.
Frequently Asked Questions
The most common reason is that the unit isn’t in standby mode, or the button isn’t being held long enough — a quick tap usually starts a regular ice cycle instead of the clean function. Power the unit off completely, confirm the water reservoir is properly filled, and press and hold the button for the full 3 to 5 seconds required. If it still doesn’t respond, a mineral-coated water sensor or a full reset is often the next step.
Yes, completely. Manual cleaning with a vinegar-and-water solution — draining the reservoir, wiping the interior and evaporator fingers, and rinsing thoroughly — is just as effective, and some would argue more thorough, since you can directly see and address any buildup rather than relying on an automated cycle.
The standard cycle runs through 5 internal stages and typically takes 10 to 20 minutes to complete, depending on the specific model. If the cycle finishes in under a minute, it likely did not run correctly.
Yes. A 1:1 ratio of white vinegar to water is the standard manufacturer-recommended solution for descaling. It is safe for both the self-clean cycle and manual cleaning, as long as you rinse thoroughly afterward and discard the first batch or two of ice produced after cleaning.
This usually means the clean cycle didn’t fully complete, or there is buildup in an area the automatic cycle doesn’t reach as thoroughly — like the ice basket itself or the exterior of the evaporator fingers. Follow up with a manual wipe-down of the basket and evaporator area, then rinse thoroughly and run a couple of discard cycles before using the ice again.
You can still clean it, but draining becomes messier without the plug. In the short term, you can tilt the unit carefully over a sink to empty the reservoir, or use a turkey baster or similar tool to remove water manually. Long-term, it’s worth checking with Igloo support for a replacement plug, since operating without one can lead to leaks during normal use.
If pressing and holding the clean button produces zero response — no light, no sound, nothing — first confirm the unit has power (try a different outlet) and that you’re holding it in standby mode, not while an ice cycle is active. If there’s still no response after a full 30-minute reset, the button or control board itself may have failed, and manual vinegar cleaning becomes your reliable long-term solution while you look into a warranty claim.
Yes. Self-cleaning refers to the automatic cycle that flushes the internal water lines and evaporator with whatever solution is in the reservoir. Descaling specifically means removing built-up mineral scale, which is why running the self-clean cycle with a vinegar solution (rather than plain water) effectively combines both — the automatic cycle does the circulating, and the vinegar does the descaling.
Final Verdict
Nine times out of ten, an Igloo self-cleaning countertop ice maker that “isn’t cleaning” is dealing with a fixable issue — an incorrect button sequence, a water level problem, or mineral buildup on a sensor. Work through the reset process first, confirm you’re using the correct hold-button sequence, and fall back on manual vinegar cleaning as a completely reliable alternative any time the automatic feature is uncooperative.
Only after ruling out these common causes should you consider it a genuine hardware failure worth pursuing through warranty support. In the meantime, your machine is never actually stuck dirty — manual cleaning gets the job done just as well.
For more troubleshooting help across different ice maker brands and models, browse the full Ice Maker Reviews troubleshooting library.
Sources and References
- Igloo Self-Cleaning Countertop Ice Maker — Official Instruction Manual
- Igloo ICEB26BK Instructions and Recipes Manual — ManualsLib
This article is for informational purposes only. Always refer to your specific model’s manual for exact button sequences and cleaning solution ratios, as these can vary slightly between Igloo ice maker models. Last reviewed: September 2026 by Ice Maker Reviews.